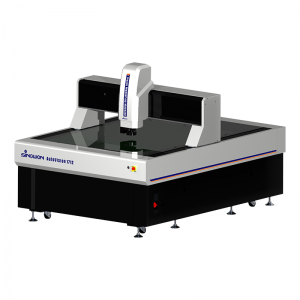
Product Characteristic
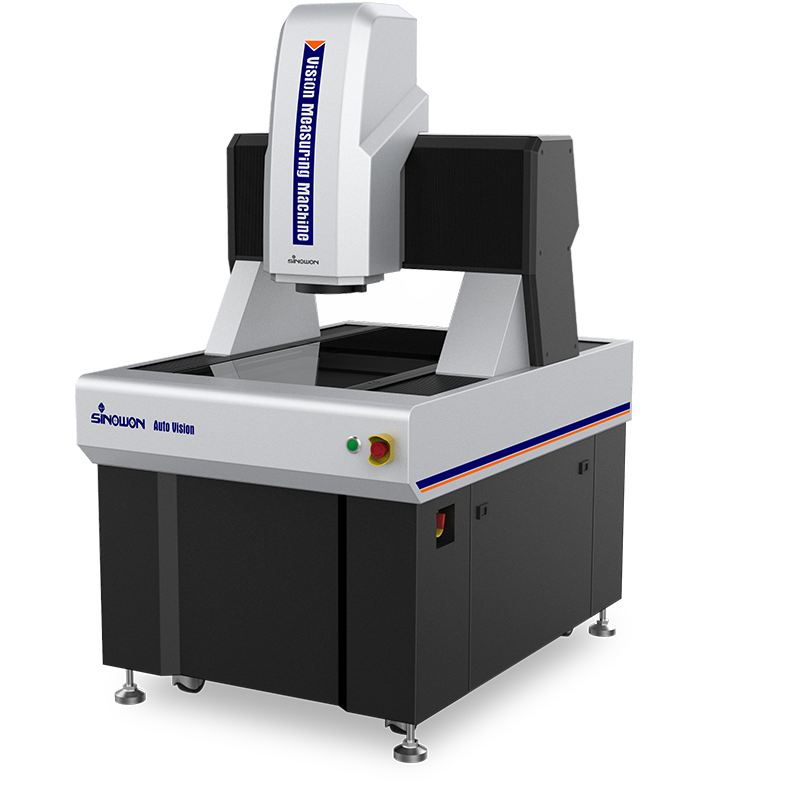
● Moving Bridge type structure, measuring table is fixed;l
● Four-axis CNC fully auto close loop control, auto measurement;l
● Indian Marble base and pillar, with good stability during measuring;l
● Sinowon imports RSF linear scale, resolution is 0.1um, grinding ball screw and AC servo motor etc. to ensure the precision and stability of the motion system;
● Imported HD color camera to meet the needs of clear observation and accurate measurement;
● 8.3x high-resolution motorized coaxial zoom lens, accurate doubling and one times pixel correction only needed;
● With programmable surface 5-ring 8-division LED Cold Illumination and contour LED parallel illumination and built-in intelligent light adjustment, it can automatically control the brightness in the 8-division;
● Powerful function and easy operation iMeasuring Software to enhance quality control;l
● Optional MCP Probe and Laser Senser Module. Machines can be customized according to customers’ requirements.
Machine Technical Specifications
| Commodity | 2.5D AutomaticVisionMeasuring Machine | 3D AutomaticContact & VisionMeasuring Machine | 2.5D AutomaticLaser-Scan & VisionMeasuring Machine | 3D AutomaticMultisensoryMeasuring Machine | ||||||||||
| Model | AutoVision542A | AutoVision542B | AutoVision542C | AutoVision542D | ||||||||||
| Code# | 523-180J | 523-280J | 523-380J | 523-480J | ||||||||||
| Sensor-Type | A-Type: One-SensorOpticalZoom-lensSensor | B: Twin-SensorZoom-lens SensorandContact Probe Sensor | C: Twin-SensorZoom-lens SensorandConfocal Laser Sensor | D: Tri-SensorZoom-lens SensorContact Probe SensorConfocal Laser Sensor | ||||||||||
| X/Y-axis Travel | (500*400)mm | |||||||||||||
| Z-axis Travel | 200mm | |||||||||||||
| X/Y/Z-3 axis Linear Scale | European Linear Scale Resolution: 0.1um | |||||||||||||
| Guidance Mode | P-Class Precision linear guide, double-track double slider guide. | |||||||||||||
| Operation Mode | Joystick controller, Mouse operation, automatic detection program. | |||||||||||||
| Accuracy* | XY-axis:≤1.8+L/200(um) | |||||||||||||
| Z-axis:≤4+L/200(um) | ||||||||||||||
| Repeatability | ±2um | |||||||||||||
| Video System** | 1/1.8" High-Definition Digital Color Camera | |||||||||||||
| 8.3X Motorized Zoom Lens | ||||||||||||||
| Optical Magnification: 0.6X~5.0X; Video Magnification: 20X~170X (21.5” monitor) | ||||||||||||||
| Field ofView(mm)(D*H*V) | Magnification | 0.6X | 1X | 1.5X | 2X | 2.5X | 3X | 3.5X | 4X | 4.5X | 5X | |||
| 1/1.8"CCD | 14.72x11.78x8.83 | 8.83x7.07x5.30 | 5.89x4.71x3.53 | 4.42x3.53x2.65 | 3.53x2.83x2.12 | 2.94x2.36x1.77 | 2.52x2.02x1.51 | 2.21x1.77x1.33 | 1.96x1.57x1.18 | 1.77x1.41x1.06 | ||||
| Illumination System | Contour | LED parallel contour illumination | ||||||||||||
| Surface | 0~255 Stepless adjustable 5-ring 8-division LED surface illumination | |||||||||||||
| Measuring Software | iMeasuring Software | |||||||||||||
| Load Capacity | 25Kg~50Kg | |||||||||||||
| Working Environment | Temperature 20℃±2℃, temperature change<1℃/Hr; humidity 30%~80%RH; vibration<0.02g's, ≤15Hz. | |||||||||||||
| Power Supply | 220V/50Hz/10A | |||||||||||||
| Dimension (W*D*H) | (1463*940*1591)mm | |||||||||||||
| Packing Size | (1690*1300*2000)mm | |||||||||||||
| Net Weight | 780Kg | |||||||||||||
Note
● L is measured length(mm), the mechanical accuracy of Z-axis and focus accuracy is greatly related to the surface of the workpiece.
● **Magnification is approximate value, it is related to the dimension of monitor and resolution.
● Field of view(mm) = (diagonal*Horizontal*Vertical)
0.5X or 2X objective is optional available and realize image magnification: 10X~64.5X or 40X~258X.
Sinowon Vision Measuring Machine Dimension

|
Model |
Effective Measurement Travel mm |
Dimensions (L*W*H) mm |
|||
|
X-axis |
Y-axis |
Z-axis |
Machine dimensions |
Package dimensions |
|
|
AutoVision432 |
300mm |
400mm |
200mm |
(1195*832*1579)mm |
(1380*1170*1650)mm |
|
AutoVision542 |
400mm |
500mm |
200mm |
(1463*940*1591)mm |
(1690*1300*2000)mm |
|
AutoVision652 |
500mm |
600mm |
200mm |
(1568*1040*1591)mm |
(1800*1400*2000)mm |
|
AutoVision862 |
600mm |
800mm |
200mm |
(1818*1157*1590)mm |
(2300*1700*2000)mm |
|
AutoVision1082 |
800mm |
1000mm |
200mm |
(2018*1357*1790)mm |
(2500*1900*2200)mm |
Moving Bridge Vision Measuring Machine Model:
|
Sensor Configuration |
2.5D |
3D |
Semiauto 2.5D |
Semiauto 3D |
|
Model |
AutoVision542A |
AutoVision542B |
AutoVision542C |
AutoVision542D |
|
Suffix |
A |
B |
C |
D |
|
Suffix Meaning |
Optics |
Optics + Probe |
Optics + Laser |
Optics + Probe + Laser |
|
Use Range |
Point • |
Point • |
Point • |
Point • |
|
Line — |
Line — |
Line — |
Line — |
|
|
Circle ○ |
Circle ○ |
Circle ○ |
Circle ○ |
|
|
Arc ⌒ |
Arc ⌒ |
Arc ⌒ |
Arc ⌒ |
|
|
Ellipse |
Ellipse |
Ellipse |
Ellipse |
|
|
Rectangle |
Rectangle |
Rectangle |
Rectangle |
|
|
Circular Groove |
Circular Groove |
Circular Groove |
Circular Groove |
|
|
Ring |
Ring |
Ring |
Ring |
|
|
Closed Curve |
Closed Curve |
Closed Curve |
Closed Curve |
|
|
Open Curve |
Open Curve |
Open Curve |
Open Curve |
|
|
High Magnification Height Measurement |
Probe height measurement |
Laser height measurement |
High-efficiency laser height measurement and stable probe height measurement |
|
|
------ |
Simple Regular 3D Dimensions |
------ |
Simple Regular 3D Dimensions |
|
|
Computable |
Distance |
Distance |
Distance |
Distance |
|
Angle ∠ |
Angle ∠ |
Angle ∠ |
Angle ∠ |
|
|
Diameter φ |
Diameter φ |
Diameter φ |
Diameter φ |
|
|
Radius ® |
Radius ® |
Radius ® |
Radius ® |
|
|
Roundness ○ |
Roundness ○ |
Roundness ○ |
Roundness ○ |
|
|
Straightness |
Straightness |
Straightness |
Straightness |
|
|
Parallelism |
Parallelism |
Parallelism |
Parallelism |
|
|
------ |
Perpendicularity |
------ |
Perpendicularity |
|
|
Concentricity |
Concentricity |
Concentricity |
Concentricity |
|
|
Angularity |
Angularity |
Angularity |
Angularity |
|
|
Symmetry |
Symmetry |
Symmetry |
Symmetry |
|
|
Flatness |
Flatness |
Flatness |
Flatness |
|
|
2D Position |
2D Position |
2D Position |
2D Position |
Note
The X/Y/Z of the automatic Vision Measuring Machine are all controlled by high-precision servo motors. Only the first programming is done manually, and the subsequent operations and calculations are all done automatically by the machine, realizing high-efficiency batch measurement. This model is suitable for measuring complex products, various sizes, workpieces that need to be measured in large quantities, and high precision requirements for workpieces (this model is a gantry structure, which can improve the measurement accuracy and machine life compared with the traditional structure, and reduce subjective errors).

