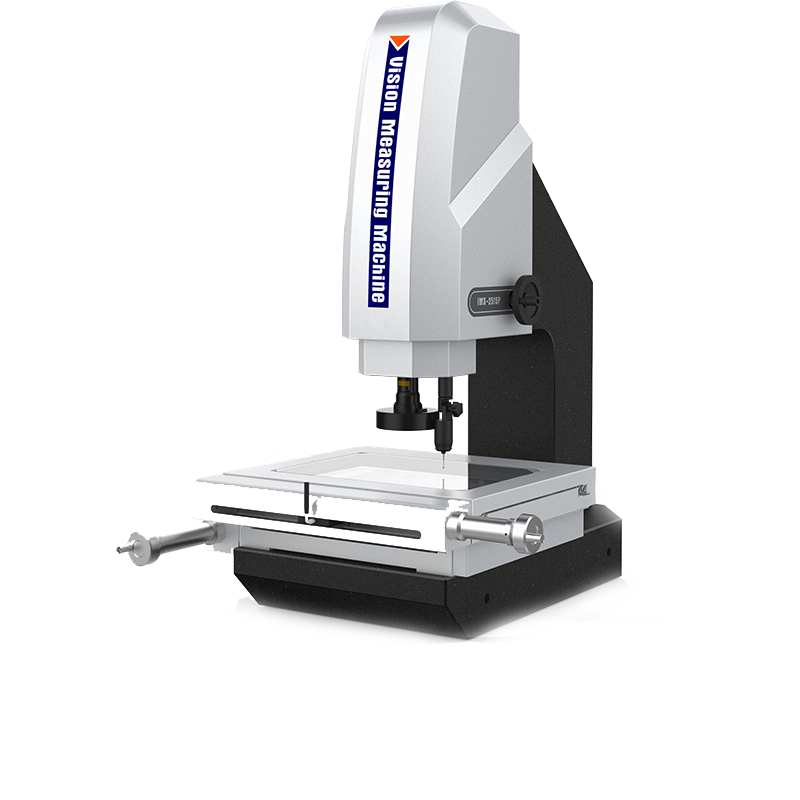
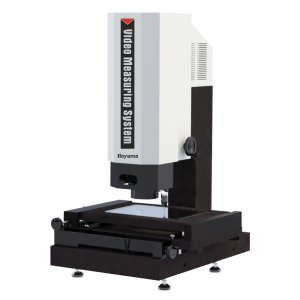
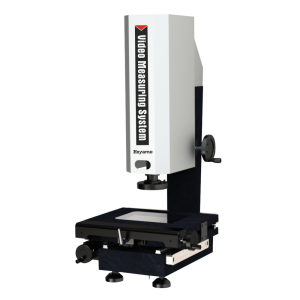
Product picture

Product Characteristic
● Adopt high-precision granite base and column to ensure the stability and precision of the machine;
● Adopt high-precision toothless polished rod and fast-moving locking device to ensure that the return error of the table is within 2um;
● Adopt high-precision instrument optical ruler and precision worktable to ensure the accuracy of the machine is within ≤2.0+L/200um;
● Adopt high-definition zoom lens and high-resolution color digital camera to ensure clear picture quality without distortion;
● Using the program-controlled surface 4-ring 8-area LED cold illumination and Contour LED Parallel Illumination as well as a built-in intelligent light adjustment module, the area brightness of the light in the 4-ring 8-area can be freely controlled;
● iMeasuring Vision measurement software improves quality control to a new level;
● Optional contact probe and three-dimensional measurement software can be used to upgrade the machine to a contact three-dimensional measuring machine.
● It can be upgraded to install an autofocus function module to achieve accurate semi-automatic measurement.
Technical Specifications
|
High-Precision Manual Vision Measuring Machine IMS-2515 Series |
||||
|
Commodity |
2.5D Vision Measuring Machine |
3D Contact & Vision Measuring Machine |
2.5D Semiautomatic Vision Measuring Machine |
3D Semiautomatic Contact & Vision Measuring Machine |
|
Product Type |
A: Optical Zoom-lens Sensor |
B: Zoom-lens Sensor and Contact Probe Sensor |
C: Zoom-lens Sensor and Z-axis Autofocus Function |
D: Zoom-lens Sensor, Contact Probe Sensor and Autofocus Function |
|
Model |
iMS-2515A |
iMS-2515B |
iMS-2515C |
iMS-2515D |
|
Code# |
521-120F |
521-220F |
521-320F |
521-420F |
|
Measuring Software |
iMeasuring |
|||
|
Metal Workbench |
408x308mm |
|||
|
Glass Workbench |
306x198mm |
|||
|
X/Y axis travel |
250x150mm |
|||
|
Z-axis travel |
High-precision linear guide, effective travel 200mm |
|||
|
X/Y/Z axis resolution |
0.5um |
|||
|
Measurement Accuracy |
XY axis: ≤2.0+L/200(um) |
|||
|
Z axis: ≤5.0+L/200(um) |
||||
|
Repeat Accuracy |
2um |
|||
|
Pedestal and Uprights |
High Precision Granite |
|||
|
Illumination System(Software Adjustment) |
Surface 4 rings and 8 zones infinitely adjustable LED cold Illumination |
|||
|
Contour LED Parallel Illumination |
||||
|
Optional Coaxial Light |
||||
|
Digital Camera |
1/2.9"/1.6Mpixel High Resolution Digital Camera |
|||
|
Zoom lens |
8.3X High-Resolution Electronic feedback zoom lens |
|||
|
Optical Magnification: 0.6X~5X times; Video Magnification: 20X~170X |
||||
|
Operation System |
Support WIN 10/11-32/64 Operating System |
|||
|
Language |
English, Simplified Chinese, Traditional Chinese, Optional other language versions |
|||
|
Dimension (WxDxH) |
790x617x1000mm |
|||
|
Gross/Net Weight |
242/175Kg |
|||
Note
● L represents the measurement length, in millimeters, the mechanical accuracy of the Z axis, and the focusing accuracy have a great relationship with the surface of the workpiece.
● ** Magnification is approximate and depends on monitor size and resolution.
● Customers can choose additional mirrors 0.5X or 2X according to their needs to achieve image magnification: 13X~86X or 52X~344X.
● Working environment: temperature 20℃±2℃, temperature change<1℃/Hr; humidity 30%~80%RH; vibration<0.02g's, ≤15Hz.
Configuration List
Standard Delivery:
|
Commodity |
Code# |
Community |
Code# |
|
Measurement Software |
581-451 |
Electronic Feedback Lens |
911-133EF |
|
Manual controller |
564-301 |
4R/8D LED Illumination |
425-121 |
|
0.5um Enclosed Grating Ruler |
581-221 |
Dust Cover |
521-911 |
|
Dongle |
581-451 |
1/2.9" Digital Camera |
484-131 |
|
Optical Calibration Plate |
581-801 |
Data cable |
581-931 |
|
Certificate, Warranty Card, Instruction, Packing List |
------ |
Contour LED Parallel Cold Illumination |
425-131 |
Optional Accessories:
|
Commodity |
Code# |
Commodity |
Code# |
|
Instrument Table |
581-621 |
Electronic Feedback Coaxial Optical Lens |
911-133EFC |
|
3D Touch Probe |
581-721 |
Calibration Ball |
581-821 |
|
Computer and Monitor |
581-971 |
1/1.8” Color Camera |
484-123 |
|
Block Gauge |
581-811 |
0.5X Additional Objective |
423-050 |
|
Foot Switch |
581-351 |
2X Additional Objective |
423-200 |


Product Measurement Space:
|
Model |
Effective Measurement Travel mm |
Dimensions (L*W*H) mm |
||||
|
X-axis |
Y-axis |
Z-axis |
Machine dimensions |
Package dimensions |
Installation dimensions |
|
|
IMS-2010 |
200mm |
100mm |
200mm |
(677*552*998)mm |
(1030*780*1260)mm |
(850*1400*1720)mm |
|
IMS-2515 |
250mm |
150mm |
200mm |
(790*617*1000)mm |
(1030*780*1260)mm |
(850*1400*1720)mm |
|
IMS-3020 |
300mm |
200mm |
200mm |
(838*667*1000)mm |
(1030*780*1260)mm |
(850*1400*1720)mm |
|
IMS-4030 |
400mm |
300mm |
200mm |
(1002*817*1043)mm |
(1130*1000*1270)mm |
(1010*1460*1810)mm |
|
IMS-5040 |
500mm |
400mm |
200mm |
(1002*852*1085)mm |
(1280*1070*1470)mm |
(1110*1500*1850)mm |
Series Model Description
|
Sensor Configuration |
2.5D |
3D |
Semiauto 2.5D |
Semiauto 3D |
|
Model |
iMS-2515A |
iMS-2515B |
iMS-2515C |
iMS-2515D |
|
Suffix |
A |
B |
C |
D |
|
Suffix Meaning |
A: Optical Zoom-lens Sensor |
B: Zoom-lens Sensor and Contact Probe Sensor |
C: Zoom-lens Sensor and Z-axis Autofocus Function |
D: Zoom-lens Sensor, Contact Probe Sensor and Autofocus Function |
|
Measuring Function |
Point • |
Point • |
Point • |
Point • |
|
Line — |
Line — |
Line — |
Line — |
|
|
Circle ○ |
Circle ○ |
Circle ○ |
Circle ○ |
|
|
Arc ⌒ |
Arc ⌒ |
Arc ⌒ |
Arc ⌒ |
|
|
Ellipse |
Ellipse |
Ellipse |
Ellipse |
|
|
Rectangle |
Rectangle |
Rectangle |
Rectangle |
|
|
Circular Groove |
Circular Groove |
Circular Groove |
Circular Groove |
|
|
Ring |
Ring |
Ring |
Ring |
|
|
Closed Curve |
Closed Curve |
Closed Curve |
Closed Curve |
|
|
Open Curve |
Open Curve |
Open Curve |
Open Curve |
|
|
High Magnification Height Measurement |
Height |
High Magnification Height Measurement |
Height |
|
|
------ |
Depth |
------ |
Depth |
|
|
------ |
Regular 3D Dimensions |
------ |
Regular 3D Dimensions |
|
|
Fit Measurement Function |
Distance |
Distance |
Distance |
Distance |
|
Angle ∠ |
Angle ∠ |
Angle ∠ |
Angle ∠ |
|
|
Diameter φ |
Diameter φ |
Diameter φ |
Diameter φ |
|
|
Radius ® |
Radius ® |
Radius ® |
Radius ® |
|
|
Roundness ○ |
Roundness ○ |
Roundness ○ |
Roundness ○ |
|
|
Straightness |
Straightness |
Straightness |
Straightness |
|
|
Parallelism |
Parallelism |
Parallelism |
Parallelism |
|
|
------ |
Perpendicularity |
------ |
Perpendicularity |
|
|
Concentricity |
Concentricity |
Concentricity |
Concentricity |
|
|
Angularity |
Angularity |
Angularity |
Angularity |
|
|
Symmetry |
Symmetry |
Symmetry |
Symmetry |
|
|
Flatness |
Flatness |
Flatness |
Flatness |
|
|
2D Position |
2D Position |
2D Position |
2D Position |
Note
Advantages of semi-automatic vision measuring machine: The semi-automatic vision measuring machine is to manually move the working platform to adjust the position of the product in the image and video area, but control the Z-axis through software and mouse to adjust the focus and height, and the Z-axis is controlled by high-precision linear guides and servo motors. The system realizes automatic focusing, reduces artificial focusing errors, improves measurement accuracy and stability, and improves work efficiency.
Company Profile
We are one of China authorized hi-tech manufacturer of metrology instrument verified by ISO9001:2015, we mainly research, develop, produce, and sell geometric dimension measurement instruments and precision devices such as multisensory coordinate measuring machines, fully automatic vision measuring machines, 2D optical measuring machines, profile projectors (optical comparators), tool microscopes, video microscopes, and precision displacement platforms since year 2006. We have already delivered and installed more than 10,000pcs of instruments to more than 5000 customers in more than 60 countries and regions, more and more international famous manufacturers choose us as the qualified supplier of quality control machines, and our service engineers have already visited USA, Canada, Mexico, Germany, Holland, France, Poland, Hungary, Czech, Turkey, Korea, Malaysia, Thailand, Philippine, Viet Nam, Singapore, Austria, India to install our instruments at customers’ site.


