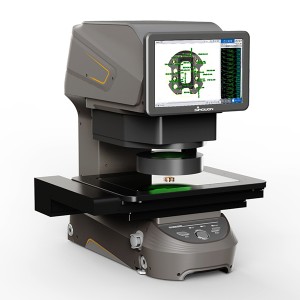
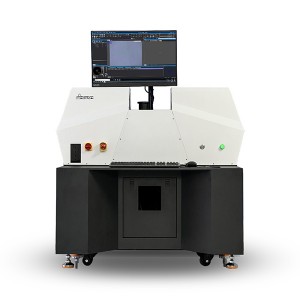
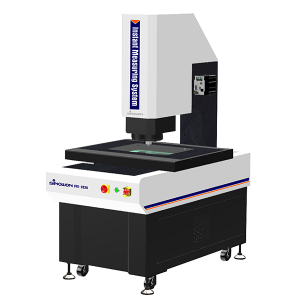
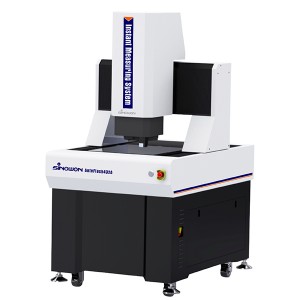
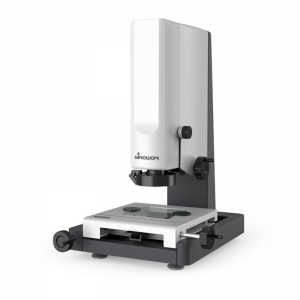
Product picture


Product characteristics
IVS Series Solution To Auto-Production Line
Solve the Inherent Problems In Dimension Measurement
Benchtop Instant Measurement System
● Table structure, compact size, easy to handle.
● One-Button Measurement,can also be matched with IO signal to achieve automatic measurement.
● The report can be uploaded automatically into data management system.
High Precision Measurement Under Surface Light
● Equipped with Double Magnification Telecentric Lens and two 20MP camera, auto multi-angle surface light and optional coaxial surface light.
● With the independent powerful AI edge calculation algorithm, it can easily realize precise edge searching on the surface and filter invalid areas for boundary clutter.
● The measurement repeatability of surface light can also reach the similar level as that of bottom light.
Fast Measurement And Easy Operation
● Can measure 100 dimensions in one second, greatly reducing the measurement time.
● The operation interface of the software is simple and easy to be understood, and the measurement program and parameter setting can be easily written.
● With automatic focusing, automatic positioning and automatic measurement function, anyone operation can obtain stable measurement results.
Application

Convenient | One-Button for Measuring

Specifications

Benchtop Structure
Compact feature, benchtop structure, easy to handle, the system can adapt to a variety of environments. It is suitable for in-line size measurement.
One-Button for Measuring
Through the positioning function, it can automatically identify the position and direction of the product. The product is placed randomly on the platform, and it can be measured by pressing one button. It can also be matched with the CUSTOMER IO signal to achieve automatic measurement.

Various Forms of Report Output
Detection report and statistical report can be completed through one-click production, without data transmission and computer input and other tedious process, support a variety of formats. It can also be automatically uploaded to the customer data management system.


Powerful Hardware Combination
Equipped with Double Magnification Telecentric Lens and two 20MP camera, auto multi-angle surface light and optional coaxial surface light. With the independent powerful AI edge calculation algorithm, it can easily realize precise edge searching on the surface and filter invalid areas for boundary clutter. The measurement repeatability of surface light can also reach the similar level as that of bottom light.

Double Magnification Telecentric Lens

20MP High-Precision CDD
Using a 1’’ 20-megapixel black-and-white camera, the number of pixels has been increased to two times that of traditional models, and the tiny edges that were difficult to observe in the past can also be observed. With movable measurement, field of view switching, the system can achieve high precision and wide field measurement, while improving accuracy and shortening measurement time.

Adjustable Light Source
Set multiple lighting units into one with lifting multi-angle surface light. The software is equipped with light automatic adjustment function. Through the built-in brightness sensor for different ambient light source, the system can automatically adjust to the best lighting conditions.


Adjustable Light SourceFast Measurement And Easy Operation
The system can measure 100 dimensions in one second, greatly reducing the measurement time. The operation interface of the software is simple and easy to be understood, and the measurement program and parameter setting can be easily written. With automatic focusing, automatic positioning and automatic measurement function, anyone operation can obtain stable measurement results.

Automatic Identification & Simultaneous Measurement
The system can automatically identify the position and direction of the product. Products can be placed randomly and can be measured simultaneously. With 300*200mm large field of vision, one-time overall imaging, even if increasing the measurement position, the system will not increase the measurement time, greatly reducing the measurement time and improve the measurement efficiency.

Easy Software Operation
The software functions are simple and easy to understand, with process instructions, operators can easily complete the product measurement program according to each instruction.

Anyone Can Obtain Stable Results
The automatic focusing and edge invalid point automatic filtering function of the software can eliminate the error caused by different focusing and the edge invalid part of the product, so as to achieve stable detection results for anyone operation.

Working Stage
The automatic focusing and edge invalid point automatic filtering function of the software can eliminate the error caused by different focusing and the edge invalid part of the product, so as to achieve stable detection results for anyone operation.

The maximum size of measuring objects allowed on the mobile platform is 300 mm × 200 mm and the height is 75 mm. The working stage adopts a new design that reduces the resistance of the motor and the feed screw to the limit. The moving distance is smaller and more stable, and the high precision measurement can be achieved without fixed measuring objects.

High Precision Drive System
By adjusting the movement of the cross roller rail in microns, excellent straightness is achieved and errors caused by the movement of the moving platform are eliminated.

Light Source Variable Lighting Unit
Accurately extract edges according to optimal lighting conditions

Assemble Multiple Lighting Units into One

White Ring Light

White Ring Light

Green Ring Light
Light source sets different lighting, according to the different detection products, automatic debugging of lighting brightness, switching the best color lighting conditions.
Automatically Switching the Best Color Lighting Conditions
With the combination of multiple variable adjustment lighting units, through the built-in brightness sensor for different environmental lighting, the system will adjust the height, brightness and angle of the light source to achieve the best visual effect, precise object edge.


IVS Series
IVS-100D
◆ Range(mm): φ100mm
◆ Ring Light (Adjustable)
◆ Auto Focus
◆ Double Magnification Telecentric Lens
IVS-202D
◆ Range(mm): 200X200X75
◆ Ring Light (Adjustable)
◆ Auto Focus
◆ Double Magnification Telecentric Lens
IVS-302D
◆ Range(mm): 300X200X75
◆ Ring Light (Adjustable)
◆ Auto Focus
◆ Double Magnification Telecentric Lens
Technical Parameter
|
Model |
IVS-100D |
IVS-202D |
IVS-302D |
||
|
Measuring Range |
X |
φ100 |
200mm |
300mm |
|
|
Y |
200mm |
200mm |
|||
|
Z |
75mm |
75mm |
75mm |
||
|
FOV |
High-Precision Mode |
26mm X 18mm |
|||
|
Wide-Field Mode |
φ100mm |
||||
|
Repeatability |
High-Precision Mode |
± 1.5μm |
|||
|
Wide-Field Mode |
± 3μm |
||||
|
Minimum Unit |
0.1μm |
||||
|
Accuracy |
High-Precision |
Without Binding |
±1.5μm |
||
|
With Binding |
\ |
±2+L/150μm |
±2+L/150μm |
||
|
Wide-Field |
Without Binding |
±3μm |
|||
|
With Binding |
\ |
±3+L/150μm |
±3+L/150μm |
||
|
Weight |
33 Kg |
45 Kg |
50 Kg |
||
|
Optical System |
Camera |
1" 20MP BW Camera * 2 |
|||
|
Lens |
Double Magnification Telecentric Lens |
||||
|
Surface Light |
Two-Ring Liftable Light |
||||
|
Bottom Light |
Green Parallel Bottom Light |
||||
|
Capacity |
5 Kg |
||||
|
Measuring Software |
GD&T Software |
||||
|
Power Supply |
220V±10%,50Hz |
||||
|
Working Environment |
Temperature: 20±3℃, Humidity: 30-80%, Vibration: <0.002g,15HZ |
||||
|
Dimension (L*W*H) mm |
600*300*650mm |
600*410*650mm |
600*510*650mm |
||


