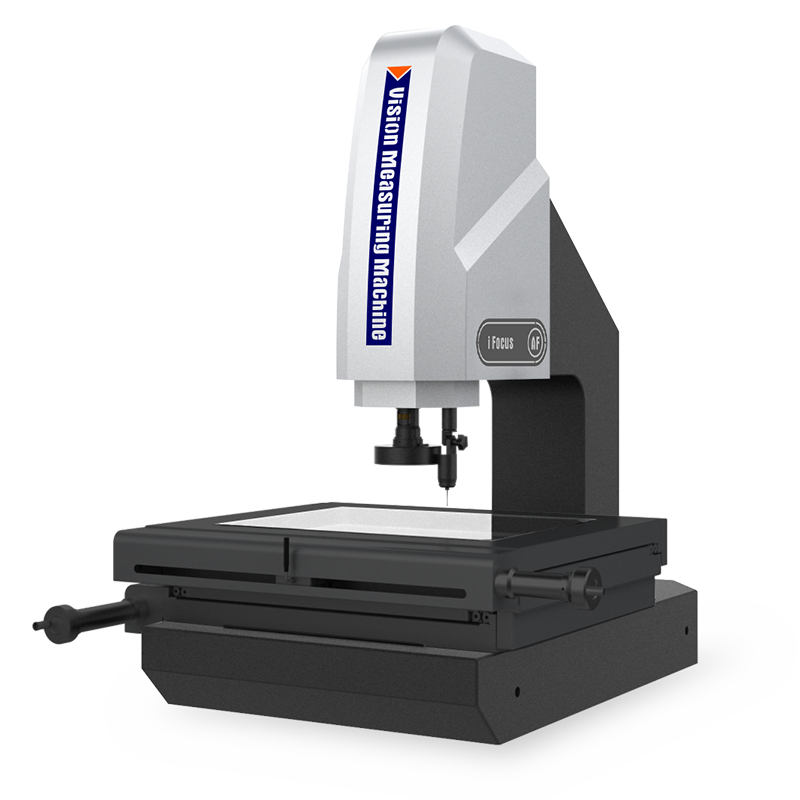
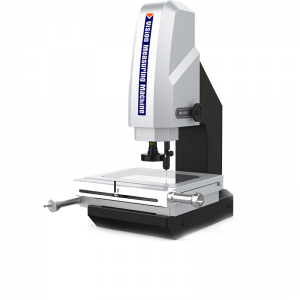
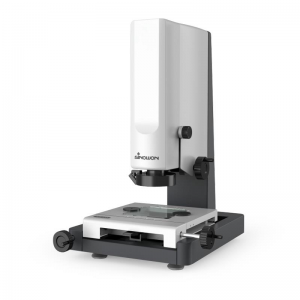
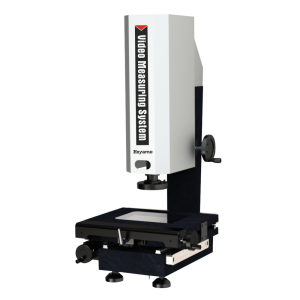
Product picture

Product Characteristic
● Adopt high-precision granite base and column to ensure the stability and precision of the machine;
● Adopt high-precision toothless polished rod and fast-moving locking device to ensure that the return error of the table is within 2um;
● Adopt high-precision instrument optical ruler and precision worktable to ensure the accuracy of the machine is within ≤2.0+L/200um;
● Adopt high-definition zoom lens and high-resolution color digital camera to ensure clear picture quality without distortion;
● Using the program-controlled surface 4-ring 8-area LED cold illumination and Contour LED Parallel Illumination as well as a built-in intelligent light adjustment module, the area brightness of the light in the 4-ring 8-area can be freely controlled;
● iMeasuring Vision measurement software improves quality control to a new level;
● Optional contact probe and three-dimensional measurement software can be used to upgrade the machine to a contact three-dimensional measuring machine.
● It can be upgraded to install an autofocus function module to achieve accurate semi-automatic measurement.
Technical Specifications
|
High-Precision Manual Vision Measuring Machine IMS-5040 Series |
||||
|
Commodity |
2.5D Vision Measuring Machine |
3D Contact & Vision Measuring Machine |
2.5D Semiautomatic Vision Measuring Machine |
3D Semiautomatic Contact & Vision Measuring Machine |
|
Product Type |
A: Optical Zoom-lens Sensor |
B: Zoom-lens Sensor and Contact Probe Sensor |
C: Zoom-lens Sensor and Z-axis Autofocus Function |
D: Zoom-lens Sensor, Contact Probe Sensor and Autofocus Function |
|
Model |
iMS-5040A |
iMS-5040B |
iMS-5040C |
iMS-5040D |
|
Code# |
521-120J |
521-220J |
521-320J |
521-420J |
|
Measuring Software |
iMeasuring |
|||
|
Marble Workbench |
708x470mm |
|||
|
Glass Workbench |
556x348mm |
|||
|
X/Y axis travel |
500x400mm |
|||
|
Z-axis travel |
High-precision linear guide, effective travel 200mm |
|||
|
X/Y/Z axis resolution |
0.5um |
|||
|
Measurement Accuracy |
XY axis: ≤2.0+L/200(um) |
|||
|
Z axis: ≤5.0+L/200(um) |
||||
|
Repeat Accuracy |
2um |
|||
|
Pedestal and Uprights |
High Precision Granite |
|||
|
Illumination System(Software Adjustment) |
Surface 4 rings and 8 zones infinitely adjustable LED cold Illumination |
|||
|
Contour LED Parallel Illumination |
||||
|
Optional Coaxial Light |
||||
|
Digital Camera |
1/2.9"/1.6Mpixel High Resolution Digital Camera |
|||
|
Zoom lens |
8.3X High-Resolution Electronic feedback zoom lens |
|||
|
Optical Magnification: 0.6X~5X times; Video Magnification: 20X~170X |
||||
|
Operation System |
Support WIN 10/11-32/64 Operating System |
|||
|
Language |
English, Simplified Chinese, Traditional Chinese, Optional other language versions |
|||
|
Dimension (WxDxH) |
1002x852x1085mm |
|||
|
Gross/Net Weight |
550/380Kg |
|||
Note
● L represents the measurement length, in millimeters, the mechanical accuracy of the Z axis, and the focusing accuracy have a great relationship with the surface of the workpiece.
● ** Magnification is approximate and depends on monitor size and resolution.
● Customers can choose additional mirrors 0.5X or 2X according to their needs to achieve image magnification: 13X~86X or 52X~344X.
● Working environment: temperature 20℃±2℃, temperature change<1℃/Hr; humidity 30%~80%RH; vibration<0.02g's, ≤15Hz.
Configuration List
Standard Delivery:
|
Commodity |
Code# |
Community |
Code# |
|
Measurement Software |
581-451 |
Electronic Feedback Lens |
911-133EF |
|
Manual controller |
564-301 |
4R/8D LED Illumination |
425-121 |
|
0.5um Enclosed Grating Ruler |
581-221 |
Dust Cover |
521-911 |
|
Dongle |
581-451 |
1/2.9" Digital Camera |
484-131 |
|
Optical Calibration Plate |
581-801 |
Data cable |
581-931 |
|
Certificate, Warranty Card, Instruction, Packing List |
------ |
Contour LED Parallel Cold Illumination |
425-131 |
Optional Accessories:
|
Commodity |
Code# |
Commodity |
Code# |
|
Instrument Table |
581-621 |
Electronic Feedback Coaxial Optical Lens |
911-133EFC |
|
3D Touch Probe |
581-721 |
Calibration Ball |
581-821 |
|
Computer and Monitor |
581-971 |
1/1.8” Color Camera |
484-123 |
|
Block Gauge |
581-811 |
0.5X Additional Objective |
423-050 |
|
Foot Switch |
581-351 |
2X Additional Objective |
423-200 |

Product Measurement Space:
|
Model |
Effective Measurement Travel mm |
Dimensions (L*W*H) mm |
||||
|
X-axis |
Y-axis |
Z-axis |
Machine dimensions |
Package dimensions |
Installation dimensions |
|
|
IMS-2010 |
200mm |
100mm |
200mm |
(677*552*998)mm |
(1030*780*1260)mm |
(850*1400*1720)mm |
|
IMS-2515 |
250mm |
150mm |
200mm |
(790*617*1000)mm |
(1030*780*1260)mm |
(850*1400*1720)mm |
|
IMS-3020 |
300mm |
200mm |
200mm |
(838*667*1000)mm |
(1030*780*1260)mm |
(850*1400*1720)mm |
|
IMS-4030 |
400mm |
300mm |
200mm |
(1002*817*1043)mm |
(1130*1000*1270)mm |
(1010*1460*1810)mm |
|
IMS-5040 |
500mm |
400mm |
200mm |
(1002*852*1085)mm |
(1280*1070*1470)mm |
(1110*1500*1850)mm |
Series Model Description
|
Sensor Configuration |
2.5D |
3D |
Semiauto 2.5D |
Semiauto 3D |
|
Model |
iMS-5040A |
iMS-5040B |
iMS-5040C |
iMS-5040D |
|
Suffix |
A |
B |
C |
D |
|
Suffix Meaning |
A: Optical Zoom-lens Sensor |
B: Zoom-lens Sensor and Contact Probe Sensor |
C: Zoom-lens Sensor and Z-axis Autofocus Function |
D: Zoom-lens Sensor, Contact Probe Sensor and Autofocus Function |
|
Measuring Function |
Point • |
Point • |
Point • |
Point • |
|
Line — |
Line — |
Line — |
Line — |
|
|
Circle ○ |
Circle ○ |
Circle ○ |
Circle ○ |
|
|
Arc ⌒ |
Arc ⌒ |
Arc ⌒ |
Arc ⌒ |
|
|
Ellipse |
Ellipse |
Ellipse |
Ellipse |
|
|
Rectangle |
Rectangle |
Rectangle |
Rectangle |
|
|
Circular Groove |
Circular Groove |
Circular Groove |
Circular Groove |
|
|
Ring |
Ring |
Ring |
Ring |
|
|
Closed Curve |
Closed Curve |
Closed Curve |
Closed Curve |
|
|
Open Curve |
Open Curve |
Open Curve |
Open Curve |
|
|
High Magnification Height Measurement |
Height |
High Magnification Height Measurement |
Height |
|
|
------ |
Depth |
------ |
Depth |
|
|
------ |
Regular 3D Dimensions |
------ |
Regular 3D Dimensions |
|
|
Fit Measurement Function |
Distance |
Distance |
Distance |
Distance |
|
Angle ∠ |
Angle ∠ |
Angle ∠ |
Angle ∠ |
|
|
Diameter φ |
Diameter φ |
Diameter φ |
Diameter φ |
|
|
Radius ® |
Radius ® |
Radius ® |
Radius ® |
|
|
Roundness ○ |
Roundness ○ |
Roundness ○ |
Roundness ○ |
|
|
Straightness |
Straightness |
Straightness |
Straightness |
|
|
Parallelism |
Parallelism |
Parallelism |
Parallelism |
|
|
------ |
Perpendicularity |
------ |
Perpendicularity |
|
|
Concentricity |
Concentricity |
Concentricity |
Concentricity |
|
|
Angularity |
Angularity |
Angularity |
Angularity |
|
|
Symmetry |
Symmetry |
Symmetry |
Symmetry |
|
|
Flatness |
Flatness |
Flatness |
Flatness |
|
|
2D Position |
2D Position |
2D Position |
2D Position |
Note
Advantages of semi-automatic vision measuring machine: The semi-automatic vision measuring machine is to manually move the working platform to adjust the position of the product in the image and video area, but control the Z-axis through software and mouse to adjust the focus and height, and the Z-axis is controlled by high-precision linear guides and servo motors. The system realizes automatic focusing, reduces artificial focusing errors, improves measurement accuracy and stability, and improves work efficiency.
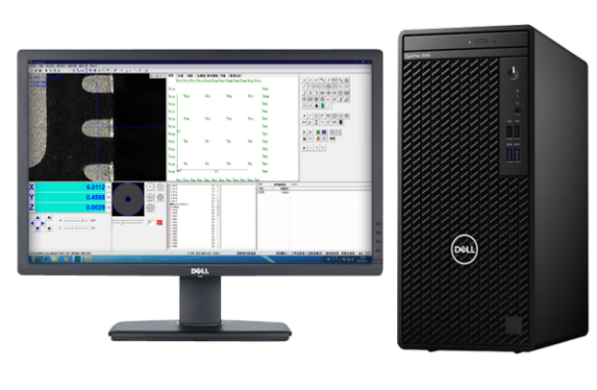
d measurement software, and the computer system is the core carrier of all operations, requiring high stability and compatibility. Configure high-performance Dell computer Optiplex desktop and WIN 10/11 genuine authorized operating system to solve your worries.
Our Factory
Own 8000 square meters of factory and office builHoyamo & Sinowon is headquartered in Dongguan City, Guangdong Province, China, with office, show room and testing room. The factory is located in Jiangmen City. The facility is a 4-story building, which includes distinct areas such as QA/QC inspection room, profile projectors production workshops, manual and automatic vision measuring machine production workshops, and the warehouse.
Keep strictly control of quality.
To achieve strict control over product quality and steadily increase production output, we imported one Zeiss coordinate measuring machine, one Renishaw XK-10 laser interferometer, two XL-80 laser interferometers for quality controlling, and several production equipment such as the JINKE JLK1177 vertical machining center.
Nice products, high-quality, excellent ROI if you work with us.
Since our establishment in 2006, our original intention has not changed. We take each year as a step and continuously improve our product quality and research and development capabilities. Currently, the accuracy of our 2D optical measuring machine SinoVision series can reach 1.2+L/200 microns.
Creating value for society, creating opportunities for employees, and creating wealth for society are the unwavering pursuits of Hoyamo & Sinowon.


